
How to Choose the Right Light Bar Brackets?

Choosing the right Light Bar Brackets is more than finding a piece of metal that fits your vehicle. The bracket must support the light bar, protect its wiring, and remain stable when the vehicle meets vibration, dust, rain, or uneven ground. A poor match may create glare, rattling, paint damage, or premature hardware failure.

Automotive lighting specialist Daniel Harper explains, “A light bar is only as reliable as the bracket holding it.” That simple observation deserves attention. Before buying, measure the light bar’s mounting width, bolt diameter, and available installation space. Then inspect the vehicle’s roof, bumper, grille, or roll cage. Every surface creates different demands. Roof mounts may need aerodynamic shaping. Bumper mounts often require stronger steel. Some plastic panels look convenient but cannot carry much weight.

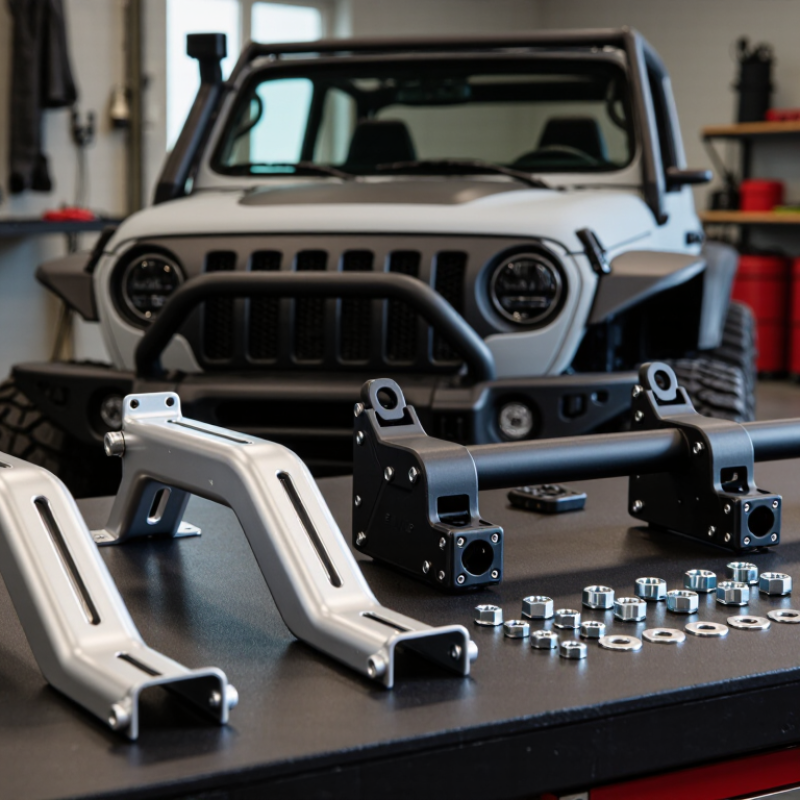
Material matters. Powder-coated steel offers strength and impact resistance. Aluminum reduces weight but may need careful reinforcement. Stainless hardware helps resist corrosion, especially near coastal roads or winter salt. Check whether the kit includes washers, locking nuts, spacers, and clear instructions. It often does not.

Fitment claims can also be imperfect. A bracket labeled “universal” may still require drilling, shimming, or minor adjustment. That is not automatically a defect, but it should be expected. Review load capacity, hole alignment, finish quality, and customer feedback before installation. After tightening, test the assembly by hand. Recheck it after the first drive. Small movement today can become expensive damage tomorrow.
How to Choose the Right Light Bar Brackets?

Understanding Light Bar Bracket Types and Their Applications

How to Choose the Right Light Bar Brackets?

Understanding Light Bar Bracket Types and Their Applications

Light bar brackets control more than mounting position. They affect vibration, beam direction, and vehicle clearance. Fixed brackets suit stable installations on flat roof rails or rigid platforms. Adjustable brackets allow vertical aiming, which helps when terrain changes. Side-mount brackets work well on front bars or protective frames. Top-mount brackets keep the light above the mounting surface. Fit matters.

Clamp-style brackets attach to tubular rails without drilling. They are practical for temporary setups, but they require careful tightening. A loose clamp can rotate during rough travel. Universal brackets offer flexibility, although their extra adjustment points may create movement. Check the bar width, bolt spacing, thread size, and available clearance before ordering. Small gaps matter. The bracket should not touch the lens, cable, hood, or roof edge.

Material selection also matters. Coated steel handles heavy loads and frequent vibration. Aluminum reduces weight but needs careful inspection around bolt holes. In field installations, I check for paint compression after the first drive. Then I retighten fasteners to the specified torque. I also test the beam angle at night, not only in a workshop. That step often reveals glare, shadows, or an uneven mount. Weather exposure deserves attention too. Drainage holes, corrosion-resistant hardware, and protected wiring can prevent early failures. I have sometimes chosen a strong bracket that was simply too tall, so measuring twice remains worthwhile. Check local lighting and road-use requirements before final installation.

Assessing Vehicle Compatibility and Mounting Requirements

Choosing the right light bar brackets starts with the vehicle, not the light bar. Roof rails, bumper tubes, grille openings, and bed racks require different mounting solutions. Measure the available space carefully. Check the bar’s width, bracket hole pattern, and hardware diameter before ordering. A bracket that fits the light may still fail on the vehicle.

Inspect the mounting surface for strength and vibration. Thin plastic panels can crack under repeated movement, especially on rough roads. Use reinforced points whenever possible. Check bonnet clearance, windshield visibility, wiring routes, and access to service panels. I once measured only the light bar width and missed the tailgate swing. That small oversight caused unnecessary repositioning. It is worth checking twice.

Tips: Park on level ground and mock up the bracket with tape first. Confirm that doors, hoods, and wipers move freely. Use corrosion-resistant hardware suited to the vehicle’s environment. Tighten fasteners evenly, then recheck them after the first drive. Keep the beam aimed responsibly and verify local lighting requirements. My own mounting tests are rarely perfect on the first attempt. Leave room to adjust.

Choosing the Right Bracket Material, Size, and Weight Capacity

How to Choose the Right Light Bar Brackets?

Choosing the right bracket begins with the material. Steel brackets usually provide strong support for heavier light bars and rough driving conditions. Aluminum is lighter and resists corrosion, but it may flex under repeated vibration. Stainless steel offers excellent weather resistance, though it can cost more and add weight. I once chose a bracket by appearance alone. That shortcut was wrong. After several trips on uneven roads, small movement appeared around the mounting points.

Size matters as much as material. Measure the light bar, mounting holes, available clearance, and roof or bumper surface. A bracket should sit flat without forcing the bar into an awkward angle. Check the bolt diameter and slot range carefully. A few millimeters can affect stability. The bracket must also clear wiring, trim, and moving panels.

Tips: Treat weight capacity as a starting point, not a promise. Include the light bar, bolts, wiring, and any protective cover in the total load. Then consider vibration, wind pressure, and sudden impacts. Choose a bracket with a reasonable safety margin. Inspect the mounting area before installation, especially if it shows rust, thin metal, or previous damage. Tighten fasteners evenly and recheck them after the first drive. This step is easy to forget. It should not be. Always compare the bracket’s tested capacity with the light bar’s actual dimensions and installation position.

Comparing Installation Methods, Adjustability, and Security Features

Choosing light bar brackets means balancing installation method, adjustability, and security. A drilled, bolt-on bracket usually offers the strongest load path, especially on a steel roof rack. Clamp-style brackets install faster and avoid drilling, but they need accurate measurements and frequent inspection. Slotted holes add flexibility. They also create more movement when bolts are not tightened evenly.

Adjustment matters when the vehicle changes direction or carries different equipment. A bracket with vertical and horizontal slots can fine-tune beam height beside a garage wall. Keep the bar close to the mounting surface. This reduces leverage and vibration.

The U.S. Department of Energy’s 2023 SSL report notes that many LED systems exceed 100 lumens per watt, increasing output without proportional electrical demand. However, higher output can still create more heat and wind resistance. That detail is easy to overlook.

Security features should match the installation location. Use locking nuts, tamper-resistant bolts, and thick backing plates where access is limited. SAE J575 durability testing addresses vibration, moisture, dust, and thermal exposure. Brackets should survive similar conditions in practice.

Grand View Research’s 2024 automotive lighting report identifies LED adoption and durability as key market drivers, so mounting hardware deserves equal attention.

Check torque after the first drive. I sometimes skip that step. It is a mistake. A loose fastener can tilt the beam, damage the rack, or make a sound that seems harmless until the next rough road.

Checking Weather Resistance, Durability, and Long-Term Maintenance

How to Choose the Right Light Bar Brackets?

Weather resistance starts with the bracket’s material, coating, and drainage design. In field installations, trapped water often causes more damage than rain itself. Choose stainless steel or treated aluminum for wet environments. Check whether fasteners match the bracket material. Mixed metals can create galvanic corrosion. The AMPP IMPACT study estimated global corrosion costs at $2.5 trillion annually, equal to about 3.4% of global GDP. That figure makes small hardware worth careful inspection.

Durability also depends on vibration and load cycling. A bracket should fit the light bar tightly, without forcing the housing into stress. Look for reinforced bends, wide mounting faces, and slotted holes for accurate alignment. IEC 60529 defines IP67 as dust-tight protection with temporary immersion testing up to one meter. However, an IP rating applies to the tested enclosure, not automatically to the bracket. A sealed light can still fail when its support rusts.

Maintenance needs a realistic plan. Inspect exposed brackets every few months, especially after winter driving or coastal use. Remove mud from drain points. Replace cracked coatings, loose washers, and discolored fasteners early. ASTM B117 salt-spray results can compare coatings, but they do not perfectly predict outdoor service life. That limitation matters. Laboratory confidence can become field disappointment. Choose brackets with accessible bolts, visible drainage, and replaceable hardware, then record inspection dates and corrosion changes.

How to Choose the Right Light Bar Brackets? — Checking Weather Resistance, Durability, and Long-Term Maintenance

Selection Dimension Recommended Benchmark Why It Matters How to Check Before Purchase Long-Term Maintenance Guidance
Bracket Material Marine-grade or corrosion-resistant stainless steel; coated aluminum may be suitable for lighter applications. The material determines resistance to rust, deformation, vibration, and repeated exposure to moisture and road salt. Confirm the material grade, thickness, load rating, and whether the specification applies to the complete bracket assembly. Rinse off salt, mud, and chemical residue regularly. Inspect for pitting, cracks, bending, or galvanic corrosion.
Surface Protection Even powder coating, anodizing, or passivation with no exposed bare metal at edges, holes, or welded areas. A damaged or incomplete finish allows moisture to reach the base metal and can accelerate corrosion. Check for uniform coverage, scratches, blistering, peeling, sharp edges, and coating damage around mounting holes. Touch up small coating chips with a compatible corrosion-protection product after cleaning and drying the surface.
Weather and Corrosion Resistance Suitable for the intended environment: normal road use, coastal exposure, off-road mud, or frequent water spray. Salt spray, humidity, standing water, and abrasive dirt can reduce fastener strength and make removal difficult. Review corrosion-test information where available and check whether the fasteners and washers use compatible materials. Wash after coastal or winter-salt exposure. Do not allow mud or water to remain trapped between the bracket and mounting surface.
Load Capacity and Stiffness The bracket should support the light bar weight plus dynamic loads from vibration, wind, bumps, and off-road impacts. A bracket can fail even when its static weight rating appears adequate if it flexes or resonates during driving. Compare the stated load rating with the light bar weight. Look for reinforced bends, gussets, and minimal unsupported span. Inspect for permanent bending, loose joints, cracked welds, and movement after the first few drives and at regular service intervals.
Vibration and Fatigue Resistance Rigid construction, secure fastening points, and a design tested or intended for continuous vehicle vibration. Repeated vibration can loosen fasteners and create fatigue cracks even without a single severe impact. Check for slotted holes, insufficiently supported tabs, poor welds, and compatibility with locking nuts or thread-locking methods. Check torque after installation and again after initial use. Replace damaged locking hardware instead of reusing it indefinitely.
Fasteners and Hardware Corrosion-resistant bolts, nuts, and washers with suitable strength and thread engagement for the vehicle mounting point. Hardware is often the first part to rust, loosen, seize, or lose clamping force. Verify bolt diameter, thread type, grade or strength class, washer size, and access for tightening and future removal. Keep threads clean and dry during installation. Replace corroded hardware and follow the vehicle or fastener torque specification.
Water Drainage Open or well-drained geometry with no unnecessary pockets that retain rainwater, mud, or cleaning chemicals. Trapped moisture increases corrosion risk and can freeze, add weight, or obstruct fastener access. Examine the underside and mounting cavities. Confirm that water can escape when the vehicle is parked or washed. Clear blocked drain paths with a soft brush or low-pressure water. Avoid sealing areas that are designed to drain.
Fit and Alignment Precise fit with adequate clearance from body panels, grilles, sensors, wiring, and moving components. Poor alignment can create stress, vibration, paint damage, blocked airflow, or interference with vehicle systems. Use the installation dimensions and mounting-hole pattern. Test-fit before final tightening and check clearance at full steering or suspension movement. Recheck alignment after impacts or body repairs. Do not force a bracket into position because this can preload the metal.
Service Accessibility Easy access to bolts, wiring, drainage points, and light-bar adjustment hardware. A difficult-to-service bracket increases the chance that inspections and minor repairs will be skipped. Confirm that common tools can reach each fastener and that the light bar can be removed without dismantling unrelated parts. Include the bracket in routine vehicle inspections, especially before long trips or after severe weather and off-road use.
Overall Durability Decision Choose the design that balances material, coating, stiffness, fastener quality, fit, drainage, and service access for the actual operating environment. No single feature guarantees long service life; durability depends on the complete system and installation quality. Use a checklist and reject parts with unclear specifications, visible finish defects, poor fit, or inadequate hardware. Perform a visual inspection at least every few months, and more frequently for coastal, salted-road, commercial, or off-road use.
Practical rule: Select brackets according to the harshest conditions they will regularly face, not only their appearance or static weight capacity.